How to Make a Picture Smaller Without Losing Resolution
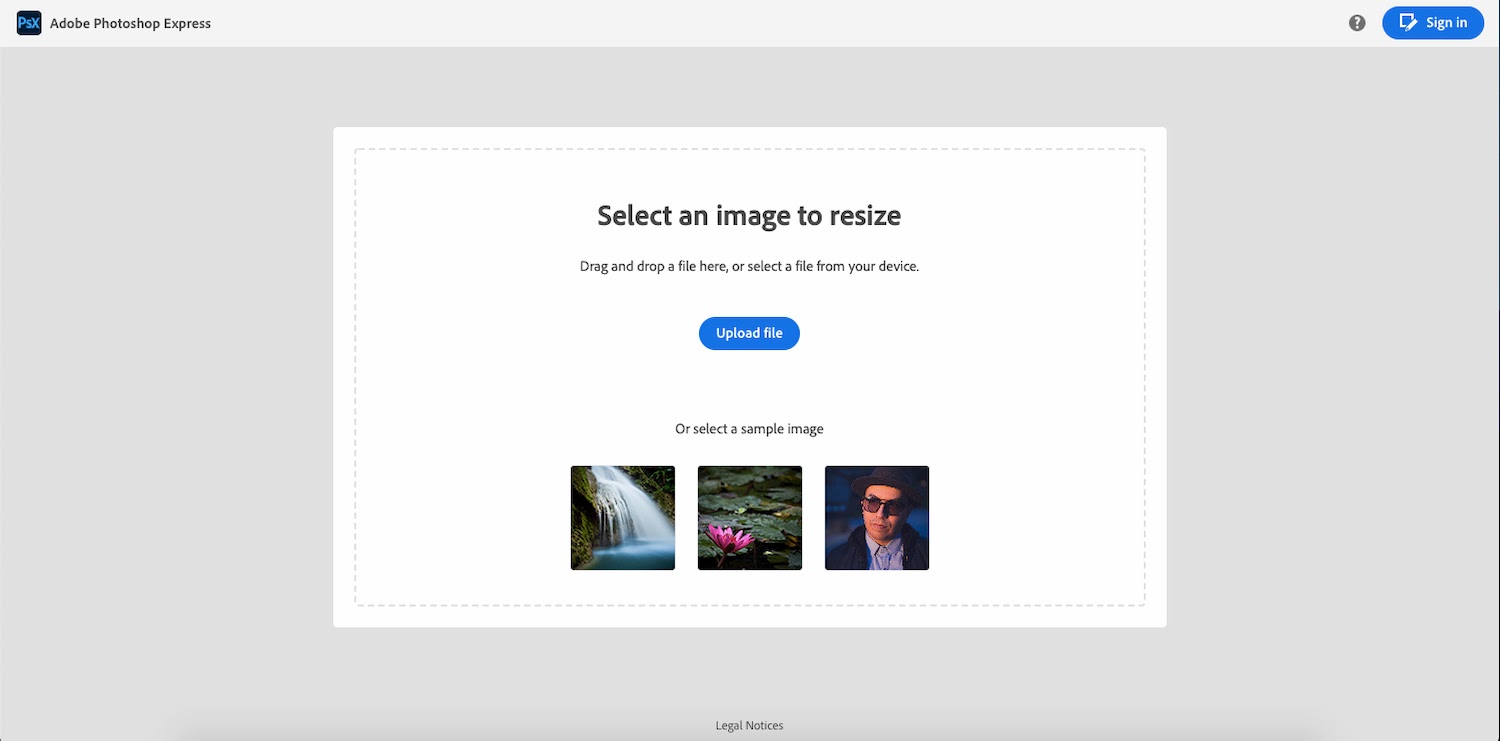
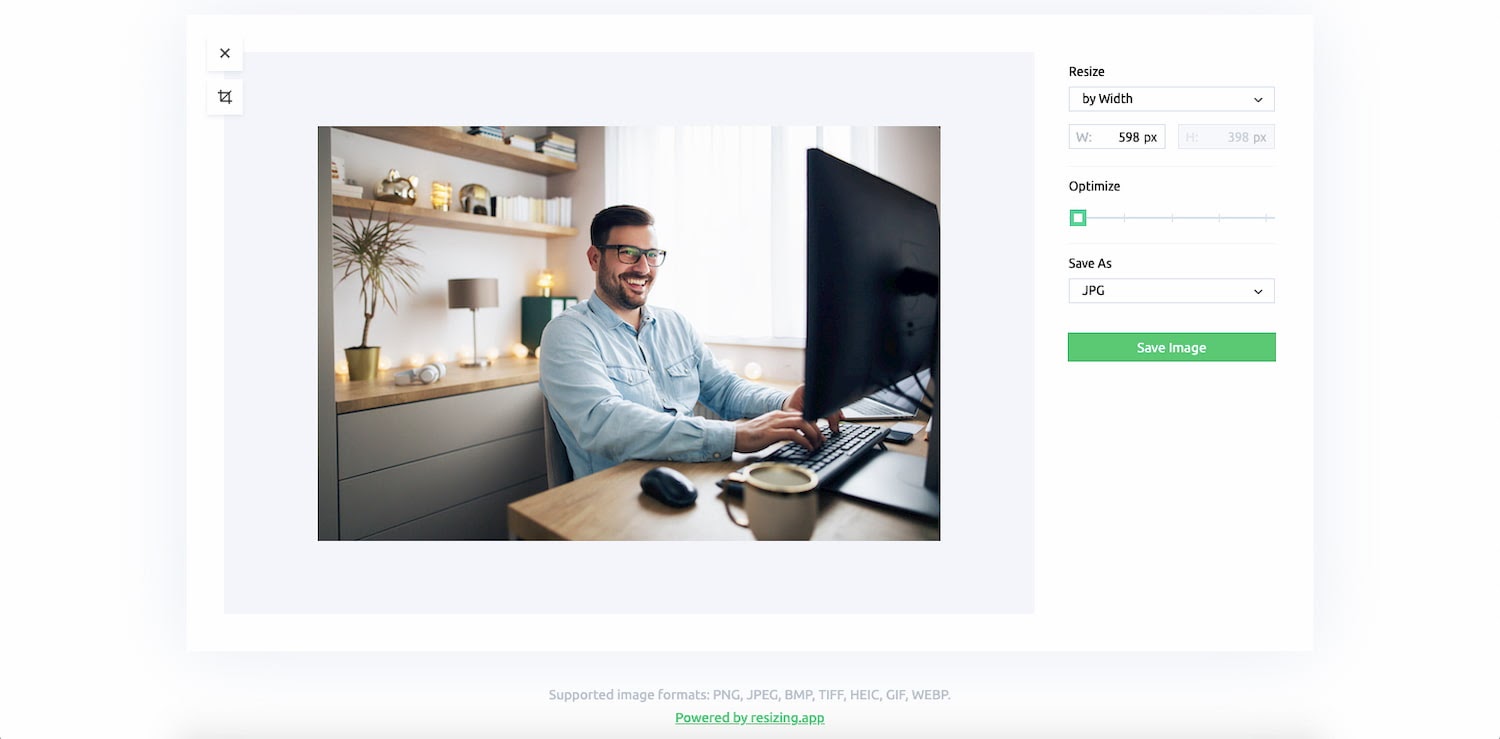
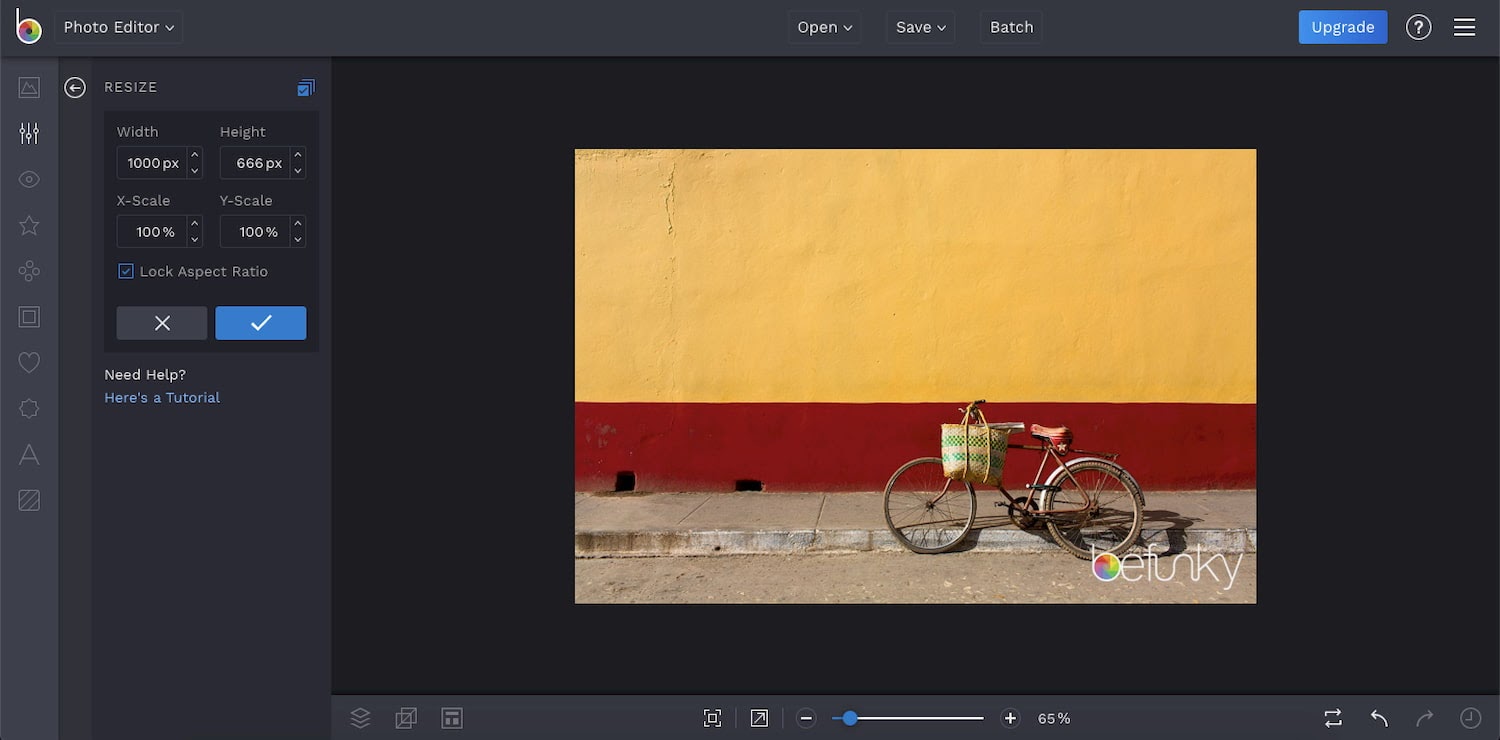
Whether you're creating a website, publishing a blog post, or running a social media platform for your business, images are essential. Users expect properly-sized, high-quality images. They're important in making your website or brand look professional and establishing trust with users. Just imagine two ecommerce sites selling the same pair of shoes — one has blurry and distorted product screenshots, and the other has crystal clear ones. Which are you more likely to buy from? Images are also important in conveying important information to the user. A how-to CSS tutorial with full-width images is more effective and preferable than a tutorial with image thumbnails. In addition to impacting the user experience in these ways, images that aren't properly resized affect website performance. Oversized, high-resolution images might look good on the front end, but their file sizes are large. That means browsers will take longer to load them, which will increase your website's overall load time. Often, this extra load time is unnecessary. Say you have an image that is 2000 x 2000 pixels but the container it's going in is only 200 x 200 pixels. In that case, your browser still loads every pixel even though it's constrained to a much smaller display area. That means the browser has to load ten times more than what's necessary. There's no standard width or height you should aim for when resizing your images. It will depend on a variety of factors, including where you're putting them on your website, whether the majority of your visitors are using desktop or mobile, and so on. A general rule of thumb is that you want to strike a balance between the lowest file size and an acceptable quality. Generally, an image file size of 100KB or less is acceptable. In this post, we'll walk through how to resize an image without losing quality. For the sake of this demo, we'll use the free Adobe Photoshop Express tool, but the basic steps apply to any tool. Then we'll take a brief look at other image resizing tools so you can find the right one for your website. With most image resizing tools, you can drag and drop an image or upload it from your computer. Some tools, like Squoosh, even allow you to copy and paste an image. Let's say the image you want to resize is 6000 x 4000 pixels, and you want to resize it to 598 x 398 px to make it the featured image of your blog post. You simply have to type in those dimensions, and click the Resize image button. Once it's been resized, click Download from the toolbar at the top of the screen. Resizing the image will significantly reduce the image's file size. But you can go one step further by compressing it. To compress an image, many tools offer a sliding scale. Moving to the left of the scale will reduce the image's file size, but also its quality. Moving it to the right will increase the file size and quality. With this particular image, I barely have to move the scale to the left to reduce the file size to less than 100KB. You can now download the image with its new dimensions and upload it to your website. Below you can find a comparison between the original image at 6000 x 4000 px and the resized image at 598 x 398 px. Looks pretty good, right? Manually resizing each and every image you upload to your website would require a huge investment of time and energy — and likely some experience in graphic design. The good news is you can simplify the process with an image resizing tool. Below is a collection of the best image resizing tools. They range in functionality and price so you can choose the right one for your needs and budget. Let's get started. Adobe Photoshop Express is a free photo editing tool that enables you to resize, compress, and crop any image in a few clicks. You can resize a photo for Facebook, a LinkedIn profile image, Twitter banner, Youtube thumbnail, or screenshot. You can resize as many images as you want for free, but you'll have to create an account to download them. Resizing.app is a free photo editing tool with an incredibly simple interface. You can resize the image by width, height, percentage, the largest side, or another custom value. Once you resize the image, you can optimize it with the sliding scale and convert it. One drawback of this tool is that it doesn't show the file size when you're optimizing it. That can make it difficult to know when to stop sliding the scale to the right. BeFunky is designed to be Photoshop for beginners. It's rich with features but presented in a user-friendly interface. You can resize, crop, and rotate images, add customizable graphics, frames, overlays, and textures, and more. With BeFunky's Batch Image Resizer, you can even resize images in bulk instead of one by one. There's a free version with 125 digital effects available, and a premium version with hundreds more. With PicResize, you can easily resize, crop, and edit your images for free. You can decrease the image by pre-set percentages, or by setting the width and height in pixels. It's important to note two things. The free version of PicResize is only for shrinking photos; you'll have to purchase PicResize Pro to enlarge them. You can only compress JPG file formats and instead of a slider, there's a dropdown menu with the options: good, better, best. While you can't see the image file size, you can set a maximum file size. Resizing images without losing quality is an important skill, whether you're a site owner, social media marketer, blogger, or something else. Thankfully, the process is easy thanks to the variety of free and premium tools available online. You can resize your images in less time and improve your website speed and delight your visitors as a result. ![Download Now: 150+ Content Creation Templates [Free Kit]](https://no-cache.hubspot.com/cta/default/53/5478fa12-4cc3-4140-ba96-bc103eeb873e.png)
How to Resize an Image without Losing Quality
1. Upload the image.
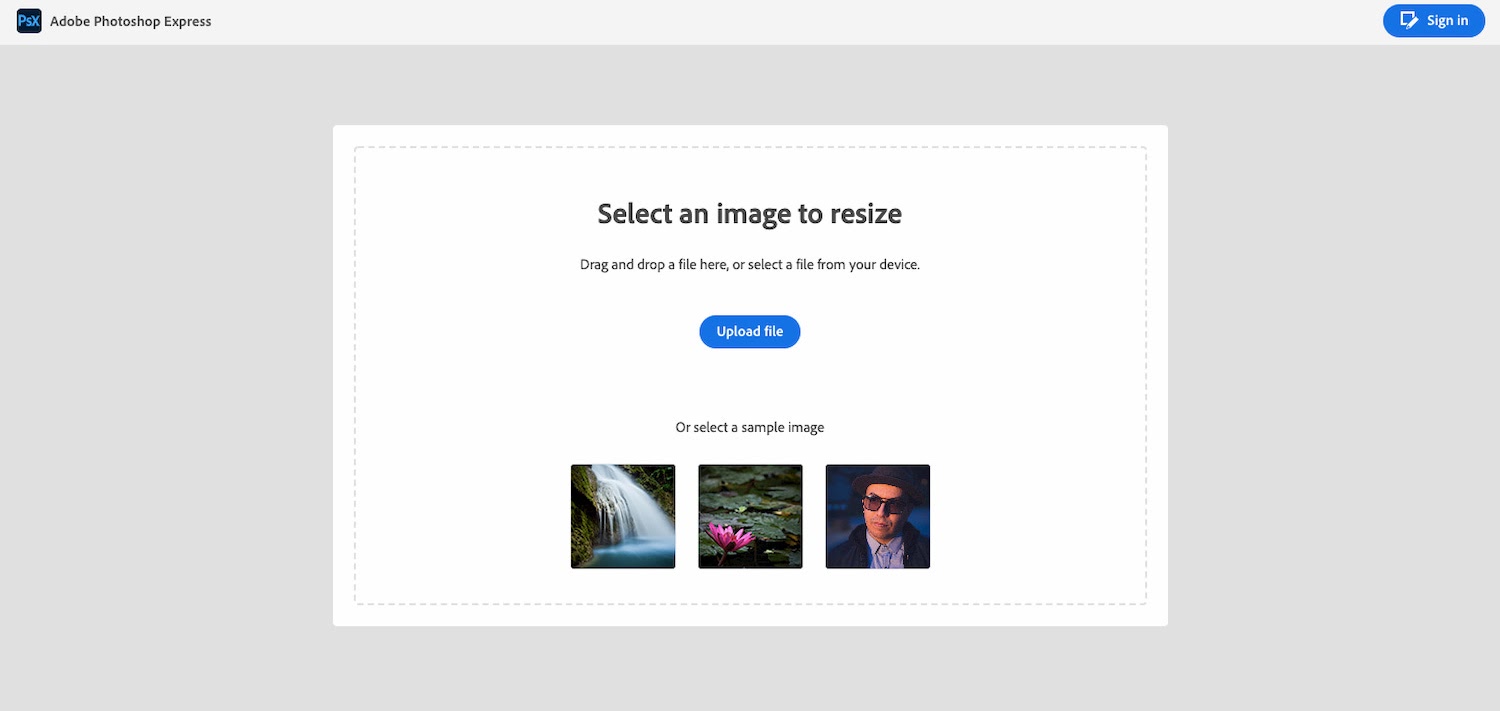
2. Type in the width and height dimensions.
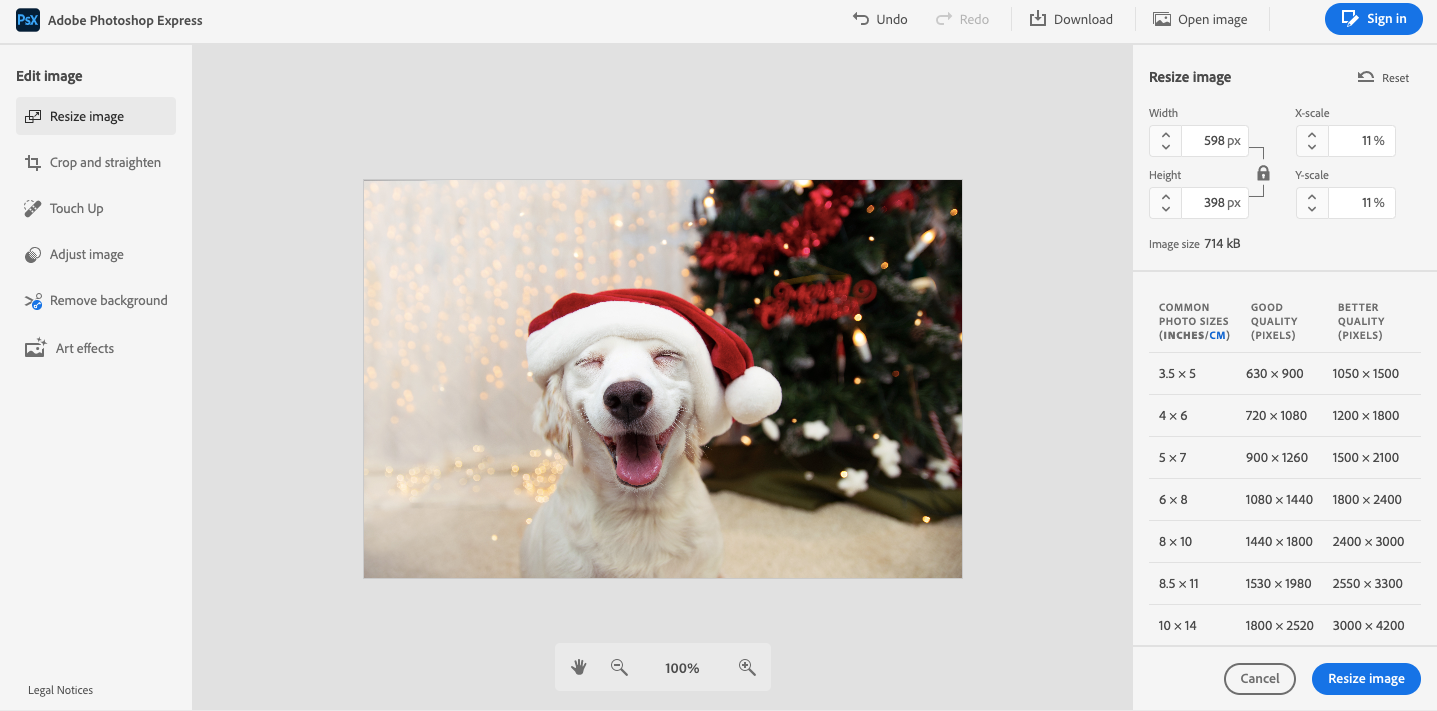
3. Compress the image.
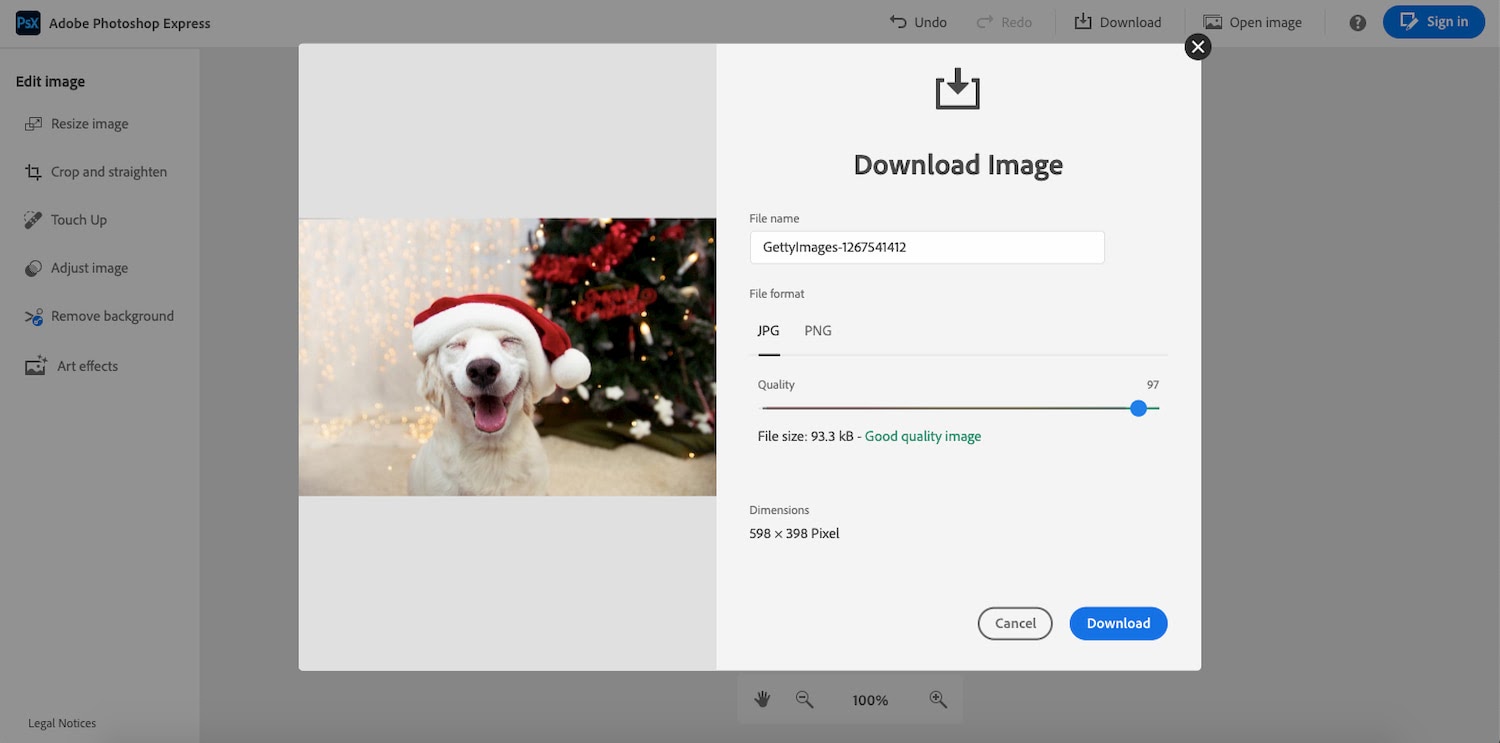
4. Download the resized image.
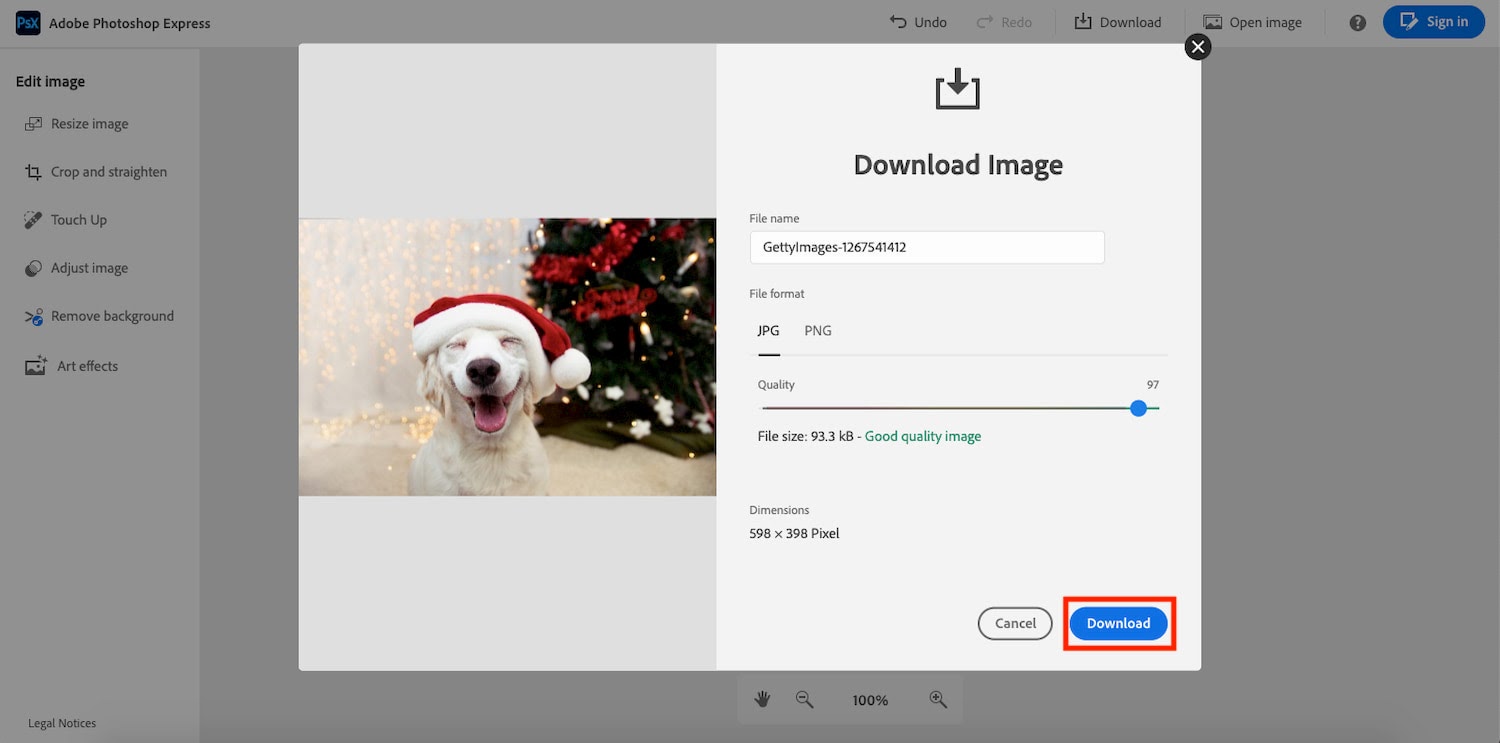
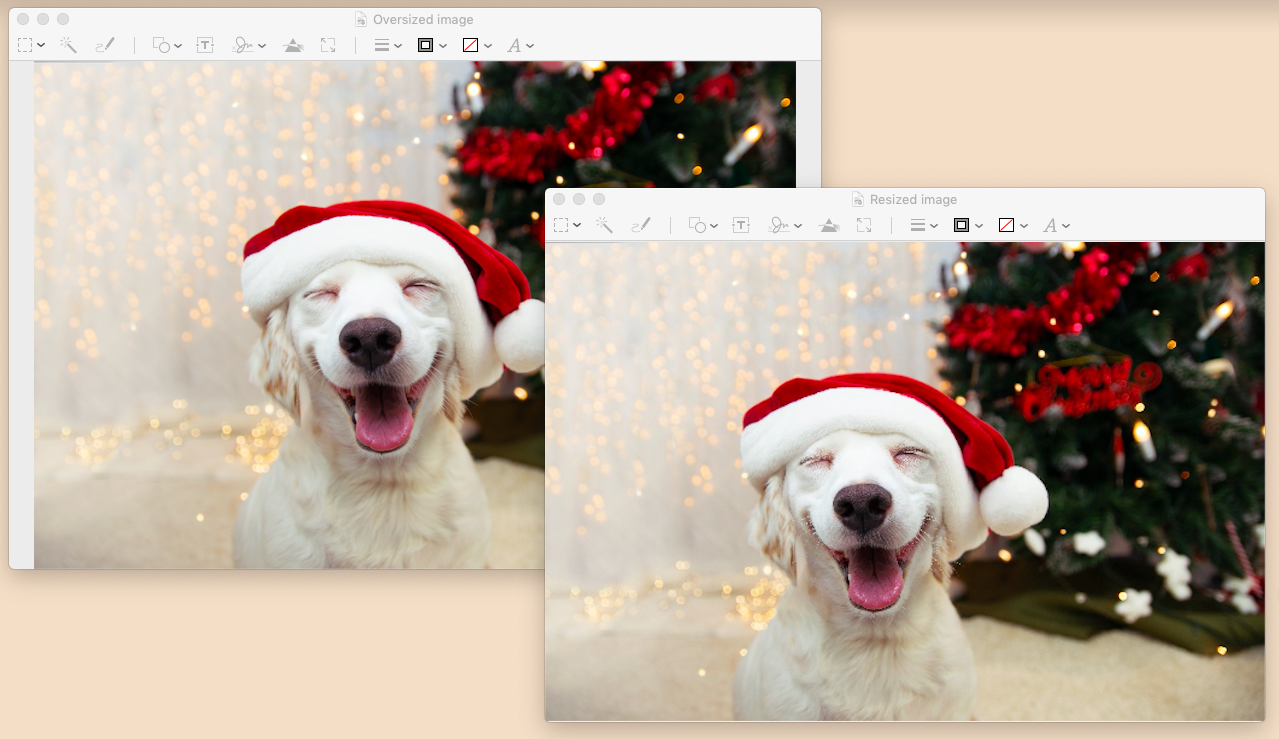
Image Resizing Tools
Adobe Photoshop Express
Resizing.app
BeFunky
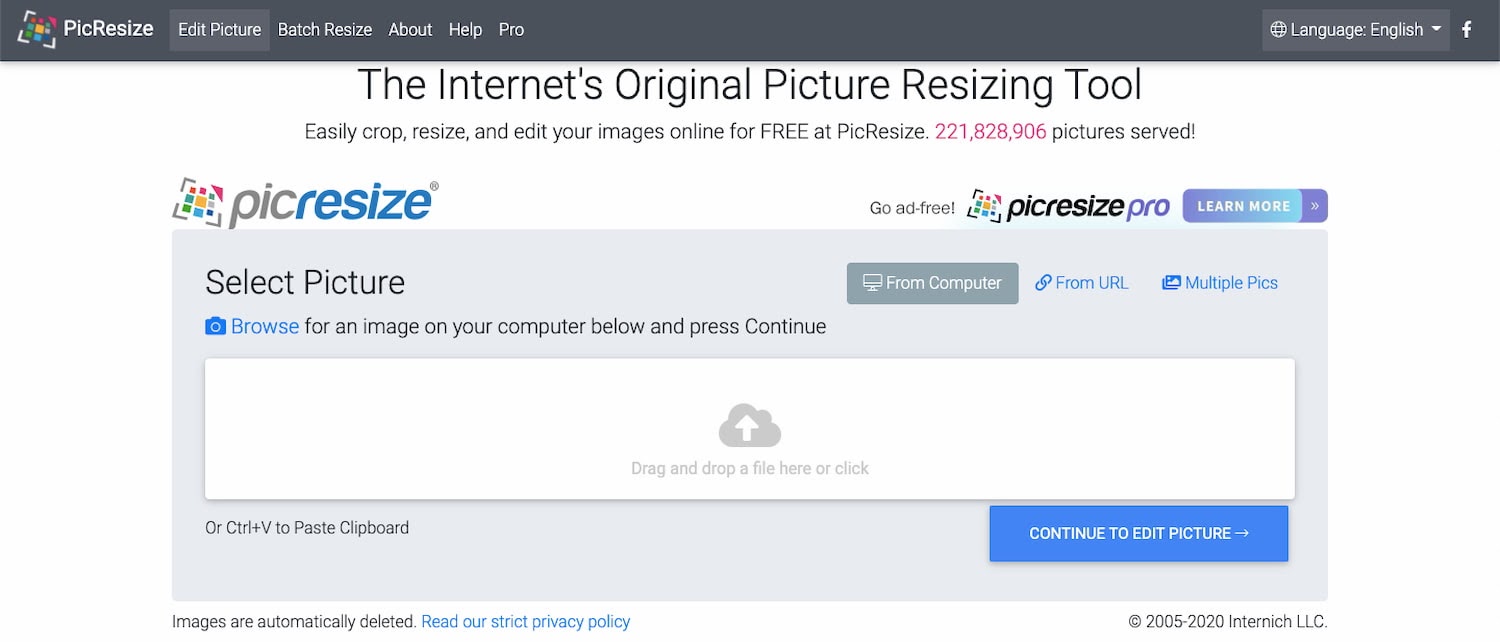
PicResize
Ready to resize?


Originally published Dec 21, 2020 7:00:00 AM, updated October 08 2021
How to Make a Picture Smaller Without Losing Resolution
Source: https://blog.hubspot.com/website/resize-image-without-losing-quality
0 Response to "How to Make a Picture Smaller Without Losing Resolution"
Post a Comment